Pages

Showing posts with label Hair Bows. Show all posts

Tuesday, September 24, 2013

Hair Bow Hairstyle for Toddlers (And Adults!) Tips & Tricks


I adore these hair bow hair styles!

This one was brought to my attention by a fellow Crafty Momma and good friend of mine.  She was just randomly showing me her daughters hair a few weeks back and I L.O.V.E.D - Loved it! 

We've all seen these styles creeping all over PIN by now, but what I loved about this tutorial in particular was that it's geared towards toddlers and did not use bobby pins.  Not a single one.

SCORE!!!

After seeing her daughters pictures, my newest mission in life was try this on my dotting daughter.

You see...She USED to let me play and brush her hair all the time, (when she didn't have hair!), and now that she has a head full of it, she runs for the hills anytime she catches sight of me with the brush. *Sigh*

That being said alone, should tell you just how easy this is!!  Wee...

So here is the tutorial we used, along with some additional tips and tricks provided by me.

I (mostly) used this tutorial here and for the most part I was really happy with it.

What didn't work for us:
Using 3 rubber bands.
Again, my daughter does not like to sit still and have her hair messed with, so I felt fortunate to get the second one in!

What we did?
Just split the looped ponytail hair (as she shows) then wrapped the hair over the middle (for the bow affect) and then tied the second rubber band around as you normally would for a ponytail.

For the extra hair that we had left, I just tucked it into the second band.  Super easy!!

That being said (I also didn't leave out near the amount of hair she did for the middle bow piece.
That's also why our "bow" is bigger and fuller.

What I will try in the future?
Remember those old school Ponytail Holders?
You know, the ones with the balls on the ends, where you wrap them and them loop one of the balls over the other to secure it.
I would use those for the 2nd step!
When your bow is as full as I made mine, it took some finesse to get the 2nd rubber band around it.
Wasn't a deal breaker, but I do like to keep things simple and this seems like a great remedy!
*Cheers* Use Me!  Use Me!

Last comment I wanted to give - 
We started out with dry hair.
This works for some and not for others.
Just stick to what you normally do during your hair routine and you'll be just fine!

Here, my friends, is what I like to call our "Masterpiece"!


She's just as cute and sassy as ever...and her poses as of late - ADORBS!
Bike - Check.
Baby - Check.
Shades - Check.
Purse - Check.

This buttercup of mine is all G.I.R.L
And she's mine.
All mine.
*Smiles*


Monday, November 19, 2012

Pumpkin Hair Bow


This is one of the fall hair bows I made for the girls in my life.  I'm a little late in posting, but since it's almost Thanksgiving, it's really perfect timing, if you think about it! 


So let's get started, shall we?


You'll Need:
12 pieces of 3/8" Curled Orange Crossgrain Ribbon 
2 pieces of 3/8" Curled Green Crossgrain Ribbon
1"x 1" piece of brown satin ribbon
Heavy Duty Needle
Thread
Scissors
Ruler

Lighter or Fray Away
Hot Glue Gun, Glue
Alligator or French Barrette Clip

To start, you'll need to curl your crossgrain ribbon.  If you've never done this before, it's simple enough, just follow these easy instructions.

Once your ribbon is curled, you will want to take them off the dowel rods and sit aside for them to be cut down.

With your ruler or cutting mat, measure your ribbon down into 3" pieces. Cut.
You will need approximately 12-15, 3" pieces/bow.
Once all your pieces are cut, heat seal your ends. This is just quickly running your lit lighter across the ends of your ribbon.  Make sure when you do this, you're doing it in a sweeping type motion, so you don't catch your ribbon on fire.

Now it's time to thread your needle.  Every bow designer is different, but I like to thread my needle and (triple) knot the end when making my korker bows.  I just always make sure to leave ample room to sew the bow together.  I typically leave about 18" hang, which will leave me with plenty of thread to swipe the needle through the center of the "pumpkin" several times for maximum hold.

Let's start building the pumpkin now.  Once your needle and thread is prepared, you will measure the true center of each piece of ribbon and where the center point is, that is where your needle will go.  You can see a full "how to" here

Place the middle (center) of your ribbon directly down into the needle.  

DO NOT MOVE, PULL, OR DO ANYTHING WITH THIS HAND UNTIL YOU ARE FINISHED ADDING ALL THE PIECES OF THE PUMPKIN!

As you are adding pieces to your needle (again, do not pull the needle through any of the pieces just yet), you will want to stagger the pieces as you go.  Think of it as a clock.  Start at 12, make your way to 1, then 2, then 3, etc., as you add them to your needle.

You will have to cinch the pieces down as you go, as your needle is only so big.  It sounds much harder than it is, trust me.  Oh and don't worry about hurting the ribbon.  My 2 year old tugs at hers all the time and is still in perfect condition.

Okay, so once all your pieces are positioned/staggered the way you want them, add your 2 green pieces in a cross fashion across the top.  These will be your leafy steams.

Now it's time to feed the needle all the way through the layers.

With your opposite sewing hand, pinch the center together and hold it taut.  Feed the needle all the way through, keeping the center pinched, so the ribbon doesn't move around.  To feed it all the way through, you may want/need a hard surface for this. The ribbon is quite strong once you get so many layers.

Now you just continue to feed the needle through the front and back as you normally would when sewing.  I like to criss-cross the stitching as I go.  Once you are close to the end of your thread, make sure the needle is going through the back side of your bow.  This is where you will snip the thread from the needle and triple knot it.

Now for the stem.  Take 1, 1"x1" piece of brown satin ribbon and fold it in half (Sealing with glue), then in half again to create the perfect "Stem".

With a small dab of hot glue, insert the glue into the center of your bow between the green leafy steams, and place your brown stem in place.

There you have it...The most adorable pumpkin bow you'll find this side of town!


Tuesday, October 9, 2012

Spider Hair Bow (Itsy Bitsy's too!)

Morning Y'all...How was your Monday?

Mine was great.  I'm kind of a odd duck, in that way. I actually enjoy Monday's.  It's a fresh start to the week - a clean slate!  This is weird to most - I know!! ;)

As a lot of you saw; Yesterday was our kick off to some fun Halloween crafts I have coming up...So, today, I just had to share this darling spider bow with you!! Aren't these guys just the cutest?!!


You won't want to miss out on this tutorial, so lets grab your supplies, and get ready!!!

Today...

You'll Need:
3/8" Black Grosgrain Ribbon
3/8" Red Grosgrain Ribbon
Googly Craft Eyes
Marabou
Scrap of felt fabric
Needle/Thread
Hot Glue Gun/Glue Sticks
Lighter
Clothespin

Got your supplies?  Okay, lets get started!

1st - You'll want to curl your black ribbon.  To do this, please follow the easy instructions here.

After you have taken your ribbon off the dowels, you will set 4 pieces of (~12") ribbon (per spider) off to the side.  If you are creating the baby version of these cuties, you will cut the ribbon into 3rd's, and will still need 3, 4" pieces...

After all pieces have been cut, take your lighter, and slightly run them along the ends of the ribbon, making sure not to catch them on fire!  It just takes a quick swipe.  This method heat seals the ends, so that the ribbon will not fray.

Next, we're going to build the base.  The Legs.

With your needle and coordinating thread, thread your needle.  You will need at least 18-24" of dangling thread to complete this project. (It is ok to knot the end of your thread - I typically triple knot it.)

Once you're needle is prepared; Hold the lower middle of the needle and measuring to the center of your ribbon piece (for instance if you're using a 12" piece, the center will be 6" and so on) and place the middle directly down into the needle.  
DO NOT PULL THE THREAD THROUGH AND DO NOT MOVE YOUR HAND!!!!!!!  In fact, you might as well get comfy, because you're going to be here for a short bit.


Repeat the above steps, for all 4 pieces, staggering as you add them to your needle.
Once all your pieces are positioned the way you want them, cinch them down on the needle, holding the needle still with your right hand, and finish feeding the needle all the way through the layers.

Feed the needle through without pulling it all the way through.  You may have to scrunch your ribbon together to see the needle.


Pull the thread tightly, then feed the thread back through - going the opposite direction. So your sewing the middle together...
Continue sewing until the body is firmly supported.
Once you have finished sewing; Your body should look like this:


Before we move onto the body, now is a good time to plug in your hot glue gun.

Moving onto the body...

For the body, I used marabou.  Ever heard of it?  It's this lovely frizzy mess of fun that they make boa's out of! 

For the large spiders, measure out 5" of marabou, for the small, measure out 3".

Large Spider
Itsy Bitsy Spider
Now it's time to grab your scrap piece of fabric.  It doesn't need to be very large.  

Fold your cut marabou piece in half, so the ends are together.  On top of a scrap piece of paper, place a small amount of glue on your scrap fabric, and place the marabou ends into the glue, squeezing the scrap fabric sides up to get a good seal.
Make sure you pinch everything into the glue, so the pieces seal together.  
If you have questions, feel free to ask!
This is what the backside of your body should look like:
To continue gluing the body, you'll separate the middle of the body, and put a small amount of glue on the lower piece (where my thumb is). 
Using a clothespin or other object, press the marabou together for a few seconds so it can dry. 

Okay...so, now it's time to piece the body and legs together:

Place a small amount of glue on the lower middle of the body, then place the body on top, and firmly press into place.  I use a clothespin to speed things along.

By the way...I do not recommend using your hands here.  
Trust me...When I say "You'll burn yourself" :)
Let the hot glue dry for about 30 seconds, then place on your googly eyes...

This is what your spiders should look like...

Large:


Itsy Bitsy:

Scary little critters, aren't they?! 

Now...IF you know me, you know I'm all about the bling and the bows, so how could any spidey gal go without a bow herself? My thoughts exactly!

For the itsy bitsy hair bows:

Measure 5" of another color of ribbon.  I used red ribbon to mimic a black widow.  OoOoOOo...Scary! ;)
Don't forget to heat seal your ends.  
Now, thread your needle and thread.  Once again in coordinating colors.  You'll want approximately 10-12" hanging from your needle.  Go ahead and snip the thread, and tie into a double knot.  Sit aside.

Take your ribbon and fold the ends to cross each other.  
Holding the middle into place, take the top loop and press it into the back side of the bow to create a smaller bow.  
With your needle and thread, sew the center of the bow, going through the front and the back at least twice, then in a winding clockwise motion, spin the thread around the bow to create a complete center.  Once you get to having about 3" of thread left, go back through the front center of the bow.
Now, you'll need to turn your bow around and snip the thread that's attached to the needle, and double knot.

With your hot glue, put a small amount on the backside of your bow and attach to the spider, by pressing firmly into place for a few seconds.
All you have left to do is attach your alligator clip. 
This is what you're finished product(s) should look like:


Here is one of my friends daughter, sporting the Itsy Bitsy Spider.  
She is absolutely precious!!

 Oh Happy Day!


Monday, October 1, 2012

How to Curl Grosgrain Ribbon


3 o'clock is creeping up.  Are you awake?  *Taps Screen*

I sure hope so, because this afternoon, I'm going to share with you a quick tutorial on how to curl grosgrain ribbon!  It's so easy, and once you try it, you'll be searching to find more projects to try this tactic on!

To start;

You'll Need:
3/8" Grosgrain Ribbon
Dowel Rods
Clothespins
Scissors

Foil covered Cookie Sheet (A jelly roll, or foil pan can also be used)
and your oven

Preheat your oven to 225 degrees, and line a cookie sheet or jelly roll pan with foil. If using a foil pan, you can skip this step.

With your 1st dowel rod, take the very tip of your ribbon and secure it with a clothes pin.
 Twirl the ribbon around the rod until you've reached the very end.  *TIP* The spacing you wind the ribbon around the dowel rod, will dictate how tight the curling will be.  For instance, if you space the ribbon closer together, the curl will be tighter.  If it's spread further apart, it will be loser.  Make sense?
Once you've twirled your ribbon to the very end of the dowel rod, snip the ribbon with your scissors, secure with clothespin, and add to the cookie sheet.

Repeat these steps,  until you've reached the appropriate number of ribbon to make your bow.  For Korker bows, I typically use 17-25 pieces total.  (These pieces are are all cut down into different lengths from one dowel.  From one dowel, I usually cut that down into 3 pieces, so you would need at least 9 dowels to make one korker bow. Capeesh?)
Place cookie sheet into your preheated oven, and bake at 225, for 30 minutes.

When the timer goes off, take cookie sheet out of the oven, and let them sit for a few minutes.

It doesn't take very long at all, so once they're cool to the touch, take each ribbon off the dowel, one by one.

To do this; un-clip the clothespins, and on a flat surface, push/pull the ribbon downward.
 You're ribbon should look like this:

Oh Yeah...YOU just did it!

Pardon me, while I break out the McHammer.  Peace!


Thursday, September 27, 2012

Cookie Monster Camera Bling

Good Morning sweet blog'lies...

Today I have a special treat that is sure to get your kiddo's smiling!  
Cookie Monster Camera Bling!! *Nom, Nom, Nom*
 
I haven't ever met a child that doesn't love Sesame Street, and I know mine is slightly obsessed.  

Like all kids, she has her favorite characters, but I absolutely adore how she says Cookie Monster. It's an extremely loud "COOKIE!" and then she'll whisper "mons-ter"

Ah...I swear that girl makes my heart grow bigger each day!

So this one's for you buttercup...

When Mommy says "Smile" you can flash those pearly whites not only at me, but at COOKIE! monster too :)


To make your own, its really quite simple...

One blue scrunchie (didn't think I'd ever repeat that word, once we left the 90's) and 2 XL googly eyes.  Hot glue the eyes into place, having one slightly overlap the other, and let it dry.

Once it's dry, attach around the lens of your camera, and get started with your very own photoshoot.

Click, Click - Horray!


Monday, August 6, 2012

Elmo Hair Bow - DIY

"La-la-la-la...La-la-la-la...Elmo's World..."

(For those of you who haven't seen the introduction to "Elmo's World", you can view the video here.)

I swear this song is addictive.  It gets stuck in my head for at least 3 hours of the day, every day, but my girl loves her Sesame Street, "Mel-mo" and "COOOOKIE monster", and that in itself makes the repetition worth it!

Since she's such a big Sesame Street fan, I thought it'd be cute to add an Elmo bow to her every growing collection.

If you'd like to make one for your little one too;

You'll Need:
3/4" Cross-grain Red Ribbon
Scissors
Ruler or some sort of measuring device
2 White Pom-Pom's smallish size (but not the mini's)
1 Orange Pom-Pom
Scrap Piece of Black Felt
Hot Glue Gun and Glue Sticks

Start by plugging in your hot glue gun.

Now the cutting process.  You can do this process in your own way, but I prefer to cut all my pieces 1st, so that I can concentrate solely on gluing when the time comes. 

Cut your ribbon into 6, 7" strips.
Measure to 7" and cut
6, 7" pieces
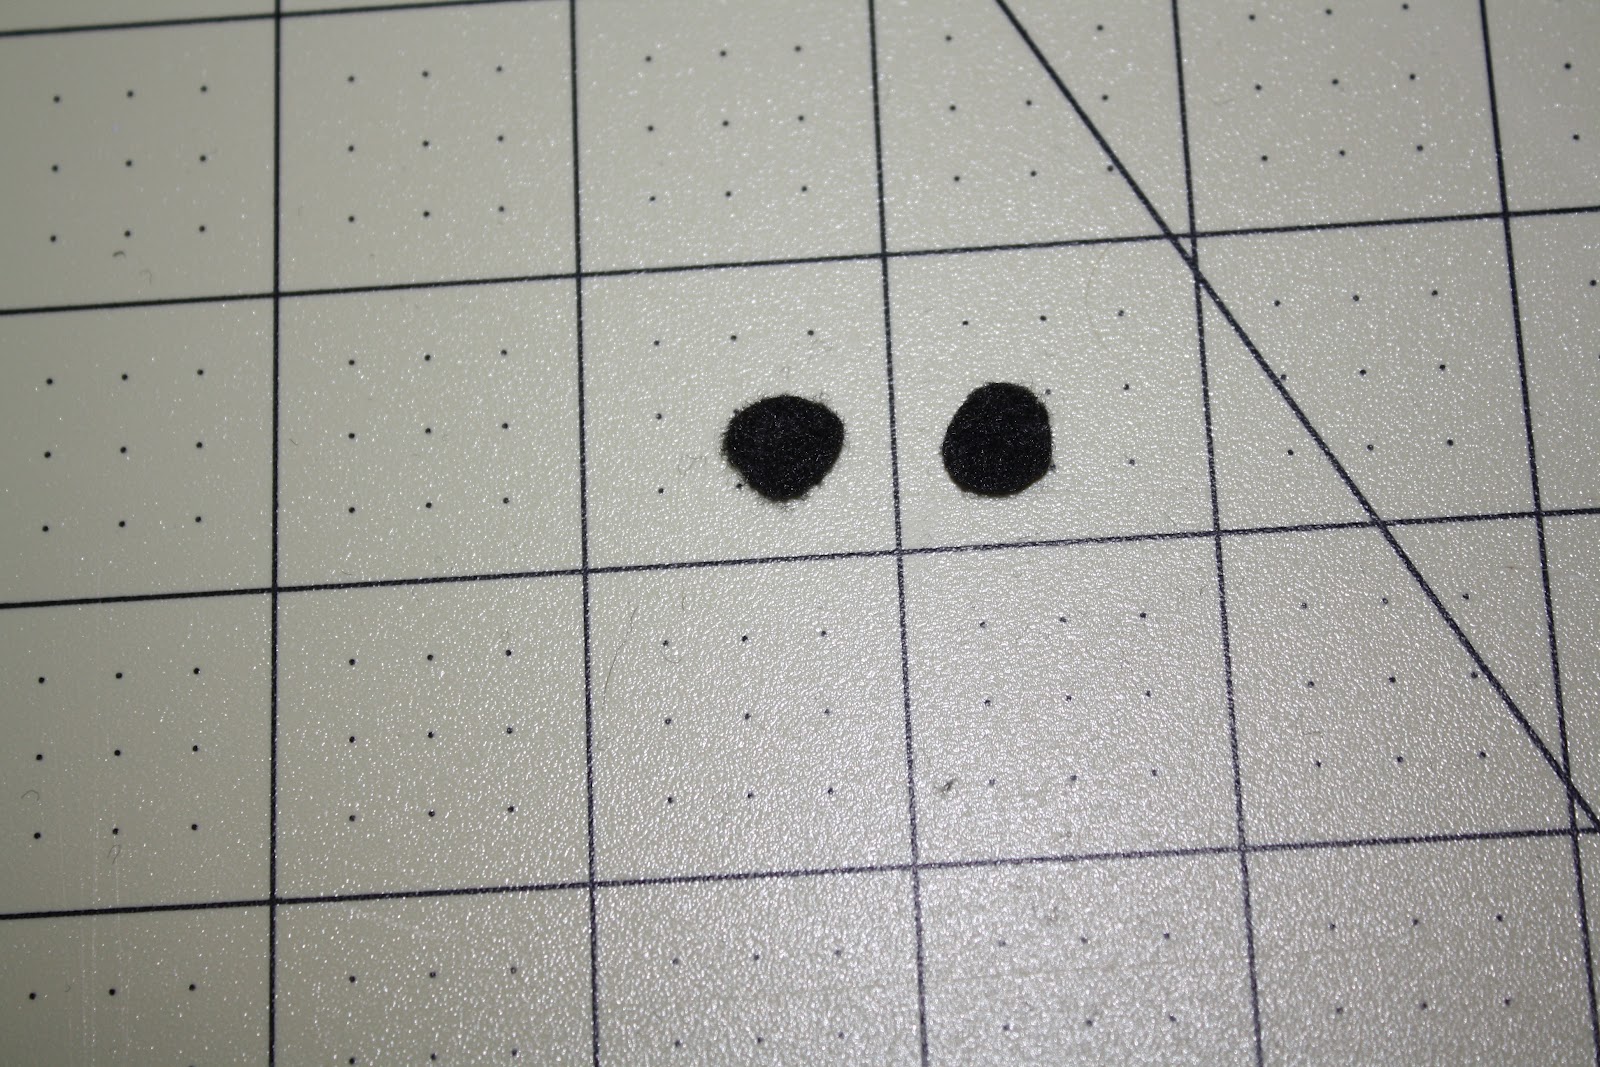
Now for the eyes.  Cut a small square of your black felt.  You don't need much.  I started with about a 1/2" x 1/2" piece.
Fold the square in half, like this:
And do a circular cut out, like you would when you'd make a paper snowflake as a kid (or adult *Wink*...whatever ;))
You should have 2 circles when you've finished
Using the same technique as you did for the eyes, cut out a mouth.  I cut about 1" x 1" and did some small trimming at the end. Again, just fold the felt in half and cut yourself a circle, then cut the circle in half.  Straight down the middle.  Sorry no pic.

Time to start gluing.  Here you're going to have to use your imagination a little bit, as it's hard to glue and take pics at the same time.

Start by putting a small amount of glue on your end of your ribbon.  Bringing the ends together to create a small circle. When you're finished, it should look like this:
On the crease you created on your circle piece, you're going to put a small amount of glue on the inside of the circle and push down so that the ribbon pieces are joining together.  Make sense?
Now for stacking.  Again, this is just how *I* do it, but you do what feels right to you!
I stack my pieces (without gluing 1st) to get a mental note of how the end result will be.  So stack...to your desire and glue piece by piece.  I just glue the center down.  No end to do any further gluing.
Your body (or head, I guess) is complete.  Moving onto the eyes.  I trimmed my pom-pom's down a little.  Just a little bit.  Glue on your black circles onto both of the white pom-pom's, then sit aside.
Going back to the head.  You're going to glue on your nose.  Directly in the center of the face.
Then add the eyes
and mouth

There you have it.  One Elmo Bow, made Just for You!