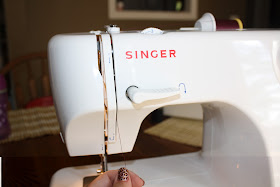
The final steps before you sew, is to thread your sewing machine needle. While is this rather challenging the 1st few times, after you do it, it's no sweat.
I think everyone has their own little way of doing this, but the premise still stays the same. I start by placing my thread into the spool holder at the top of the machine. Make sure to secure with the spool holder, cap, thingy. I'm real technical...can't you tell :)
Move the lose thread from the spool, to the left hand side of your machine. You're about to thread your machine. Wee...
 |
| To the left, then down, around the pin... |
 |
| Now down the "shoot". I believe this is known as the "Tension" but again with the technicalities. FYI: Most sewing machines these days have the instructions marked on the machine for reference. |
Now before you move your thread back up the other side, you'll want to pull the hand wheel towards you to raise the hook.
 |
| Hand Wheel (On right hand side of machine) |
Once the hook is raised, go back up the tension, and place your thread over the hook and back down the other side.
Once more, you're going to turn the hand wheel towards you. This will raise the needle. This is optional, but it's easiest if you have your needle to be up as high as it can go.
Take a quick look at your thread, before we go to the next step. Is it frayed? If so, go ahead and snip the end with scissors. Now that it's straight, go ahead and thread your needle, going directly through the front of the eye of the needle (or the hole), and pull a few inches of thread off to the left.
Holding onto the thread you just pulled to the left, move your hand wheel towards you once again, so that the needle goes directly down into the machine, into your bobbin, and pulls up your bobbin thread.
Continuing to hold onto the thread, pull your hand wheel towards you once again. As the needle raises, it will pull the bobbin thread up. Pretty cool!
Now you can slowly pull your bobbin thread out, and to the left.
I didn't photograph it, but to start sewing, you will want both thread pieces placed behind the needle. So you're shifting the thread a full 90 degrees to your right. Make sense?
Okay...then there you have it. Time to start on that 1st project!
One last piece of advice? When you start sewing, make sure you raise and lower the sewing foot. If you have any questions, just ask!
Hope this series has helped and gotten you well on your way. I'd love to see pictures of your 1st projects, just send them my way!!


No comments:
Post a Comment